Skip to content

How to Choose a Mouthpiece Adapter 7 Buying Tips

A Mouthpiece Adapter can look like a small, simple part, but the wrong fit may cause leaks, wobbling, or poor airflow. The right choice depends on the devices you already own, the connection types, and how you plan to use them. Small details matter.

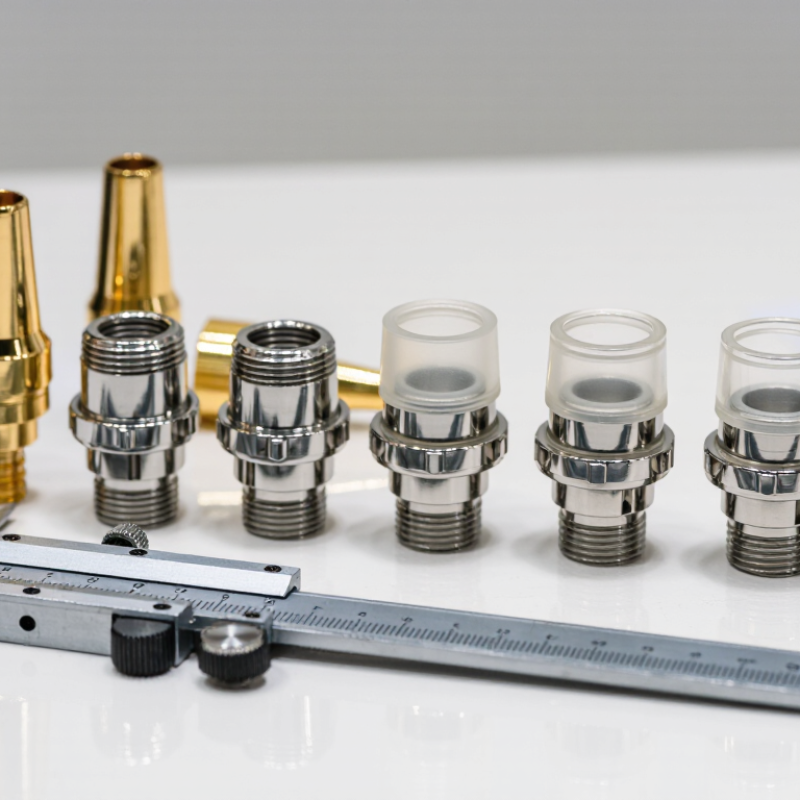
Start by checking the mouthpiece and device measurements rather than relying on appearance alone. A ruler or caliper can help, though product specifications are often more precise. Look for the adapter’s inner and outer diameters, connection style, and stated compatibility. If a listing uses vague terms such as “universal,” verify the dimensions before buying. Universal does not always mean universal.

Material is another practical consideration. Smooth, durable surfaces are easier to inspect and clean, while sharp edges or rough seams can make a part uncomfortable to handle. Check whether the manufacturer provides clear care instructions and product details. These are useful signs, but they do not guarantee a perfect fit.

This guide covers seven buying tips, from measuring connections to assessing materials, construction, and seller information. It also explains when an adapter may not solve the problem. Sometimes the measurements are unclear. Pause and confirm them before ordering. A few minutes of checking can prevent an avoidable return, yet even careful buyers can miss a detail. That is worth remembering.
How to Choose a Mouthpiece Adapter 7 Buying Tips

Understand the Purpose and Types of Mouthpiece Adapters

A mouthpiece adapter connects a mouthpiece to an instrument or fitting that does not match its size or shape. It can make a compatible setup possible without replacing the mouthpiece. Fit matters: a loose connection may wobble or leak air, while a forced fit can damage the parts. Check the instrument’s receiver and the mouthpiece’s shank before choosing an adapter. Small differences count.

Adapters come in several forms. A reducer or expander bridges different diameters; a tapered adapter matches parts with different internal shapes. Some are straight, while angled versions help when space or hand position is limited. For brass instruments, the shank and receiver dimensions are especially important. For other setups, confirm the connection type rather than relying on appearance alone. Measure carefully.

Material and finish can affect durability, weight, and how securely the adapter seats. Smooth edges help prevent scratches, and a snug fit should not require excessive force. A practical check is to assemble the parts gently and look for gaps or movement. It is easy to focus too much on material; fit is usually the more useful starting point. I still see that mistake. Choose an adapter made for the specific connection, and ask a qualified repair technician if measurements are unclear.

How to Choose a Mouthpiece Adapter: 7 Buying Tips

Compare these practical selection priorities when choosing an adapter. Ratings are guide values, not laboratory measurements or market statistics.

How to read the chart: A rating of 5 indicates a critical fit or usability check. Confirm compatibility and dimensions first, then consider connection security, airflow, material, and maintenance.

Check Instrument, Mouthpiece, and Adapter Compatibility

A mouthpiece adapter only works well when the instrument, mouthpiece, and adapter match. Check the instrument’s receiver size and shape, then compare them with the adapter’s input and output ends. The adapter must connect the mouthpiece to the instrument, not merely look close in size. Small gaps matter. Air leaks can weaken response and make notes harder to control.

Check the mouthpiece shank’s diameter, length, and taper against the adapter specifications. If you can, measure the parts with calipers; otherwise, use the instrument maker’s sizing information or ask a qualified repair technician. A snug connection should seat evenly without rocking. Do not force it. An adapter that needs pressure may be the wrong size or shape, and forcing it can damage a delicate joint.

Also confirm that the adapter is intended for your instrument family and playing setup. Some models change the mouthpiece angle or add length, which can affect comfort and balance. Materials may influence weight, but fit comes first. It is easy to assume that two similar-looking fittings are interchangeable. That assumption can be wrong. If dimensions are unclear, pause before ordering and verify both connection ends with the seller or a technician. After fitting, play a few sustained notes and check for movement, leaks, or an unexpected change in response.

Compare Materials, Construction, and Fit

A mouthpiece adapter should feel stable without forcing the mouthpiece into place. Fit matters most. Check the opening diameter and connection type against your instrument’s specifications, since small differences can cause wobbling or air leaks. If possible, compare the adapter with the original part or measure the contact points with a caliper. A snug fit is useful; a tight fit that needs twisting or pressure may damage the rim.

Material affects weight, feel, and upkeep. Metal adapters often feel sturdy, but their added weight may change balance. Hard plastic can be lighter and easier to handle, though thin walls may flex under pressure. Look for smooth edges and consistent thickness. Avoid rough seams, cracks, or sharp internal ridges. These details can be easy to miss in product photos.

Construction deserves a close look. A clean, even joint is less likely to shift during use, but appearance alone cannot confirm a precise fit. Check return terms and sizing information before buying. I used to focus too much on material; dimensions mattered more than I expected. That is not always obvious. If the adapter feels loose, pinches, or changes the instrument’s response, stop and reassess rather than forcing it.

Assess Playing Comfort, Seal, and Sound

A mouthpiece adapter should feel secure without forcing your jaw, lips, or hands into an awkward position. Test it with your usual mouthpiece and instrument, not by judging its fit alone. Play soft notes, then sustained tones, and notice pressure, slipping, or fatigue. Small leaks matter. A joint that shifts during a phrase can interrupt airflow and make response less predictable.

Check the seal by gently rotating the assembled parts and playing notes across the instrument’s range. Listen for sudden changes in tone, airy noise, or notes that become harder to start. Compare the adapter with your normal setup at the same volume and in the same room. Room acoustics can mislead you; I would not treat one quick test as proof of a better sound.

For safe comparisons, keep playback levels moderate. NIOSH’s 1998 Criteria for a Recommended Standard: Occupational Noise Exposure sets 85 dBA over eight hours as its recommended exposure limit, using a 3 dB exchange rate. That is a hearing-safety benchmark, not a target for judging tone. A sound-level meter can help keep tests consistent, but it cannot tell you whether the seal or playing feel is right. After testing, recheck the joint: a comfortable first impression can still hide a small fit problem.

Balance Durability, Price, and Maintenance Needs

A mouthpiece adapter should fit securely without forcing the connection or leaving a visible gap. Check its dimensions against both pieces of equipment, and inspect the inside for rough edges that could catch residue. Fit matters first. A low price means little if the adapter wobbles or needs constant adjustment.

Durability depends on more than material alone. A well-finished metal adapter may resist dents, while a sturdy polymer option can be lighter and easier to carry. Consider how often you will connect and remove it. Frequent handling puts extra stress on threads and joints. If possible, check for smooth threading and an even finish before buying.

Maintenance affects the real cost over time. Choose a shape you can reach with a soft brush, and follow the maker’s cleaning instructions for its material. Avoid assuming that every adapter tolerates the same cleaners or temperatures. That detail is easy to miss. A cheaper part may still be practical if it cleans easily and replacement is simple. On the other hand, paying more for features you will not use is not automatically better. Balance expected wear, cleaning effort, and purchase price against your actual routine. A small amount of play can seem harmless at first, but it may become annoying after repeated use.

How to Choose a Mouthpiece Adapter: 7 Buying Tips — Balance Durability, Price, and Maintenance Needs
Buying Tip What to Check Practical Guidance Typical Price (USD) Durability & Maintenance
1. Confirm compatibility Instrument model, mouthpiece size, connection type, and insertion depth. Compare the adapter’s stated inlet and outlet sizes with both parts. Check whether the connection is tapered, threaded, or a push-fit; similar-looking fittings may not seal or seat correctly. $5–$25 A correct fit reduces rocking, air leaks, and wear. Keep the adapter and mating surfaces clean so grit does not damage the fit.
2. Choose a suitable material Brass, stainless steel, aluminum, or molded plastic. Brass is common for many instrument fittings and offers a balance of strength and cost. Stainless steel resists corrosion well; aluminum is light; plastic is often inexpensive and lightweight. $5–$35 Metal options generally tolerate frequent handling better. Plastic can crack under impact, while plated surfaces may wear; avoid abrasive cleaners on finishes.
3. Inspect the connection finish Smooth edges, clean threads, even plating, and absence of burrs. Look for a consistent surface and threads that engage smoothly by hand. Reject parts with sharp edges, visible cracks, cross-threading, or a loose connection. $8–$30 A well-finished adapter is less likely to scratch a mouthpiece or bind during installation. Wipe away moisture and debris after use.
4. Consider weight and balance Adapter length, overall weight, and how it affects the instrument’s balance. For a lightweight setup, compare the adapter’s dimensions and material. A long or heavy adapter can shift balance and may place extra leverage on the connection. $5–$30 Use a size that provides the needed fit without unnecessary length. Avoid putting sideways pressure on the adapter when attaching or removing it.
5. Check sealing requirements Whether the design needs a gasket, O-ring, or other seal. Some connections seal through a precise taper or thread; others use a replaceable ring. Follow the fitting’s instructions rather than adding tape or sealant that could interfere with seating. $5–$25 Replace a worn, flattened, or cracked seal with the correct size. Keep seal grooves free of residue to help maintain a secure fit.
6. Compare total value, not just price Material, fit accuracy, finish, included seals, and return policy. Basic adapters often cost around $5–$15; more specialized or robust metal versions may cost $15–$35 or more. Verify dimensions before buying, especially for less common fittings. $5–$35+ A low-priced part may be suitable for occasional use, while frequent use can justify stronger materials and better finishing. Keep purchase details for replacement matching.
7. Plan for easy maintenance Accessibility of internal surfaces, corrosion resistance, and availability of replacement seals. Choose a design that can be wiped or rinsed as appropriate for its material and use. Do not soak parts with glued components or mixed materials unless the maker permits it. $5–$35 After use, remove moisture and let the adapter dry fully. Store it separately to prevent scratches, and inspect threads and seals periodically for wear.